Description
This is a Rubik’s Cube solver app, which scans the Rubik’s cube usig the webcam from the built-in one in the computer. To solve the cube it uses the cube api in python and to scan the cube in it uses OpenCV. For this project, I used python. Python gives easy use of GUI components that look nice while also appealing to the user. It also has many useful packages that help with the input of a Rubix Cube and algorithms to solve it, such as OpenCV, NumPy, and scipy. OpenCV helps with inputting the cube and NumPy/scipy helps with the math used to find the solution. This sets the project apart from similar software on the computer, which complicates the input process with increased steps as they don’t use a webcam.
OpenCV Scanning
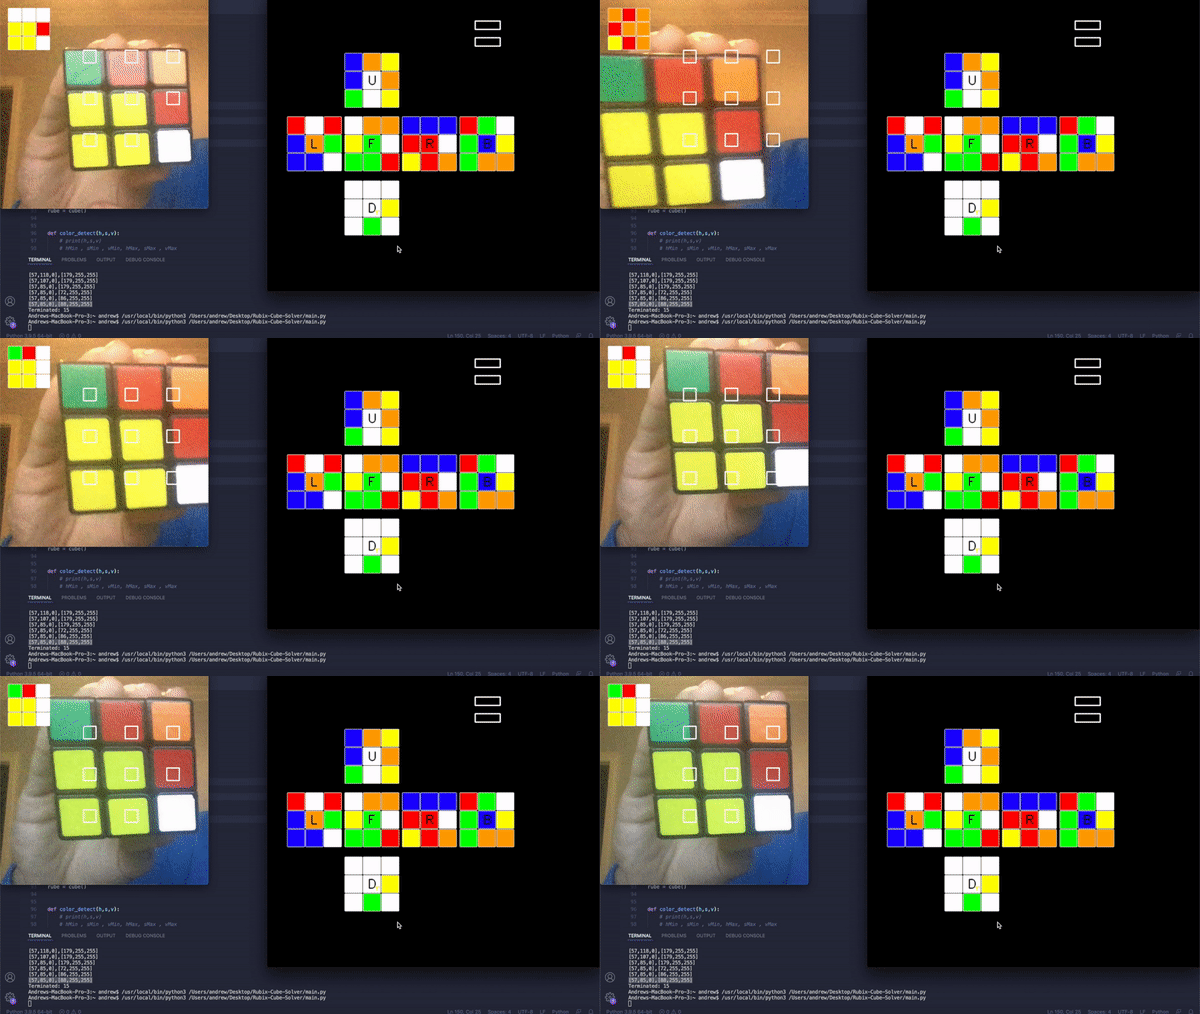
To simpilfy the inputting of the cube for the user, I decided scanning using the built-in camera on a laptop. To do this, I used the package OpenCV, as it gave an easy way to take camera input and check the colors of that input. Implemeting this however was much more difficult than orgially thought. There were countless issues, but the most persistent was the different colors depending on the lighting and reflection.
def color_detect(h,s,v):
    # print(h,s,v)
    # hMin , sMin , vMin, hMax, sMax , vMax
    if h <= 11 and h>3 and s > 111 and v > 0 and s<=203 and v <= 255:
        #[3,111,0],[11,203,255]
        return 'red'
    elif h <= 22 and h > 13 and s > 106 and v > 0 and s<=203 and v <= 255:
        # 13,106,0],[22,203,255]
        return 'orange'
    elif h <= 40 and h>25 and s > 105 and v > 0 and s<=255 and v <= 255:
        # [25,105,0],[40,255,255]
        return 'yellow'
    elif h <= 88 and h>57 and s > 85 and v > 0 and s<=255 and v <= 255:
        #[57,85,0],[88,255,255]
        return 'green'
    elif h <= 80 and h>69 and s > 0 and v > 0 and s<=255 and v <= 255:
        #[69,0,0],[80,255,255]
        return 'blue'
    elif h <= 179 and h>69 and s > 0 and v > 0 and s<=36 and v <= 255:
        #[69,0,0],[179,36,255]
        return 'white'

    return 'white'
This code handles most of the color dectection, as it checks the (h,s,v) values from camera. It then filters those value into a color string which is returned back through the function. However because (h,s,v) represets the hue, saturation, and value, and the hue/saturation both change depending on reflation it gives a different value in different situations.
Cube Handling
class cube():

    def __init__(self):
        self.state=  {
            'up':['blue','orange','yellow','blue','white','orange','green','white','yellow',],
            'right':['blue','blue','blue','red','red','white','yellow','red','orange',],
            'front':['white','orange','orange','yellow','green','white','green','green','red',],
            'down':['orange','red','green','red','yellow','yellow','white','yellow','yellow',],
            'left':['red','white','red','blue','orange','green','blue','blue','white',],
            'back':['red','green','white','green','blue','yellow','green','orange','orange',]
        }

        self.sign_conv={
            'green'  : 'F',
            'white'  : 'U',
            'blue'   : 'B',
            'red'    : 'R',
            'orange' : 'L',
            'yellow' : 'D'
          }
To handle the cube I used a class. However, the main state is held in the dictionary state, where each key(up, right, ...) is one of the side of the cube. If I wanted to change the state of one of the upper side I can simply call; state[up][x] = y.
Cube Solving
    def solve(self, s):
        r = ''
        for i in s:
            for j in s[i]:
                r += self.sign_conv[j]
        #print(r)
        print("answer:", Cube.solve('r'))
        return Cube.solve('r')
Solving is pretty simple, I just used a built api that takes a string as the parameter and outputs the solution.
Demonstation
Scanning the Cube in

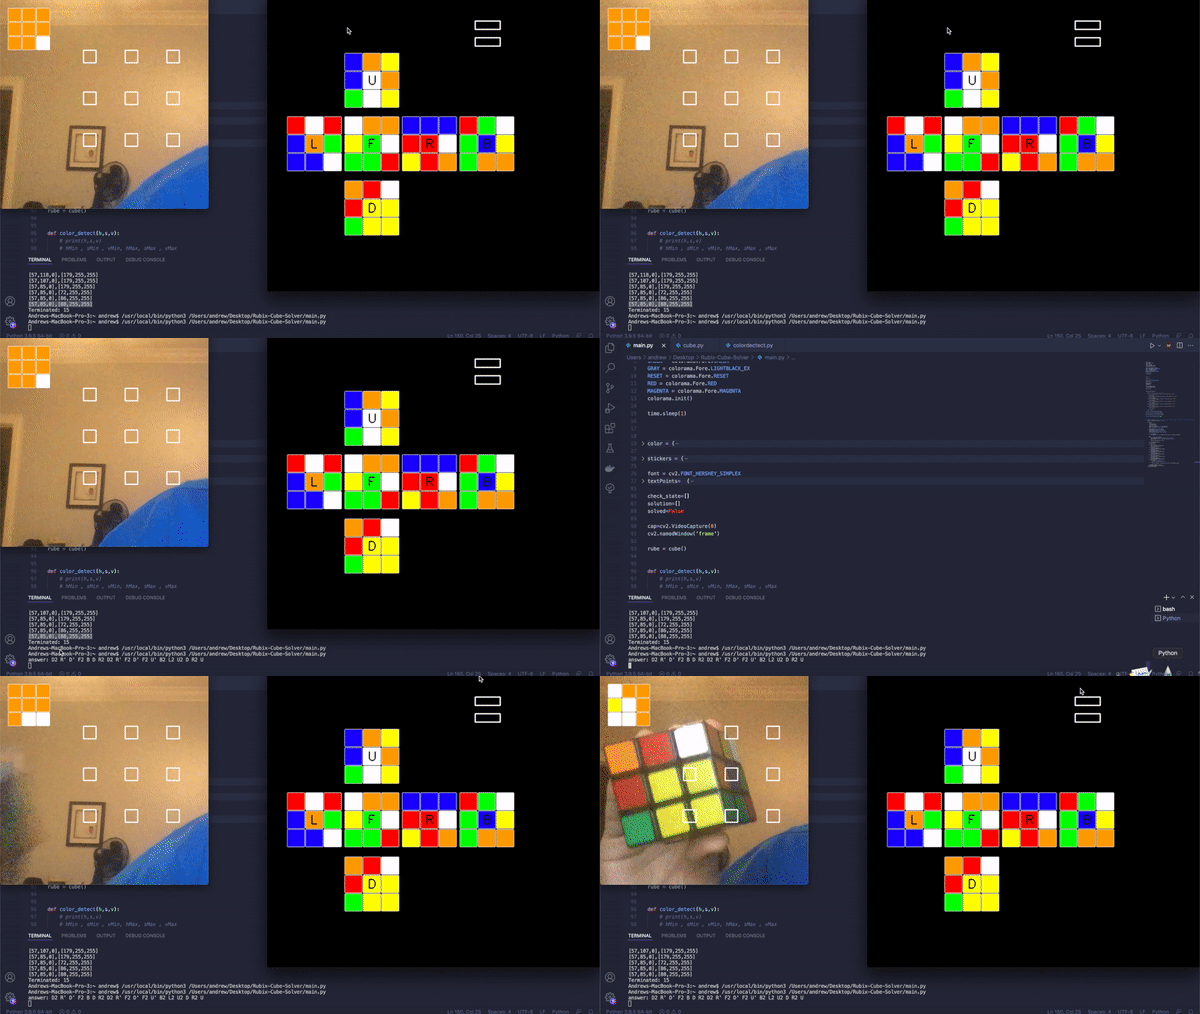
Solving the Cube
Here is a short gif of how the program outputs the solution. It gives the user cube notation instructions for how to solve it in the command line. From there the user can then follow those steps to accurate complete the rubix cube:

Conclusion
This was a very hard project for me, I was not familiar with color detection or cube solving before starting. I still think I need more work with OpenCv, but it was a good first step to help get used to the basics.
You can find my Github link for the code here

